S5SlideShow
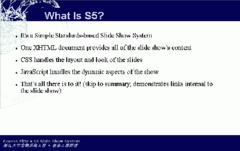
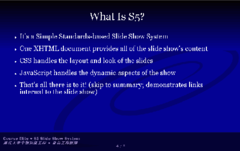
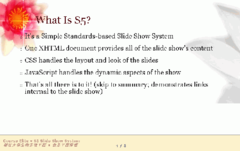
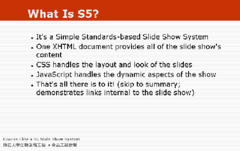
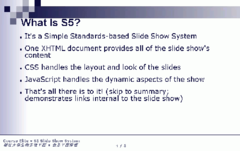
S5 or simply S5 is a cross-browser slide-show system using pure HTML and JavaScript. Its name is derived from Simple Standards-based Slide Show System — 5 times «S», or simply S5.
S5SlideShow is a MediaWiki extension allowing simple, fast and convenient creation of slide shows using S5 in the context of MediaWiki and Wiki pages.
The source code lives in Google Code:
- http://code.google.com/p/mediawiki4intranet/source/browse?r=mw4i-ext#hg%2Fextensions%2FS5SlideShow
- (TBZ2-archived version from 2011-05-10): http://mediawiki4intranet.googlecode.com/files/S5SlideShow-2011-05-10.tar.bz2
Extension page on mediawiki.org: Extension:S5SlideShow.
Slide show example (russian language): User:StasFomin/VideoKnowHow.
Usage
S5SlideShow gives a simple, convenient and fast method for creating slide shows from plaintext. Of course, it supports the full range of MediaWiki features such as Flash video, Mindmaps, code highlighting and etc.
You can turn any wiki page into a slide show. To do so, put there a block (slide show definition) with following content:
<slide attribute="value" [attribute="value" ...]>
;attribute: Value
[;attribute: Value ...]
</slide>
I.e. attributes may be specified either as XML-like <slide> tag attributes, or as definition list items inside it. There are the following attributes:
- style
- S5 skin name used for slide show (see #Skins).
- headingmark
- A character sequence, which is searched inside all headings text (== Just a simple MediaWiki headings ==), and if it’s there, the heading will be mapped to slide in the slide show mode. If the heading includes this substring — it will be a slide. If the headingmark attribute value is empty, all headings will be mapped to slides.
Example: ; headingmark: Slide:. - incmark
- A similar seq for selecting «step-by-step» slides. Step-by-step means that if there are any lists (ordered # or unordered *) on the slide, they will be shown grayed, and with each mouse or Enter key click, the next list item will be highlighted.
- pagebreak
- A «slide break» character sequence — breaks the slide into several slides.
- scaled
- If this attribute’s value is 1, true or yes (case insensitive), then the experimental scaling mode will be enabled for slides — S5 would try to scale each slide independently of others. This is not the basic S5 ability, but an our feature.
- author
- Slide show author (for the first (title) slide). Can contain Wiki markup.
- title
- Slide show title. Can contain Wiki markup.
- subtitle
- Slide show subtitle (for the title slide). Can contain Wiki markup.
- subfooter
- A string displayed in page footer on each slide. Can contain Wiki markup. Also, the word {{date}} is special inside it — it is replaced with last article edit timestamp.
After adding the slide show definition, you only need to click the skin preview image emerged in the place of the definition in article view. Then, if you’re in Opera, click F11, and if you’re in Firefox or Chrome, the presentation will begin itself.
Skins
There is 6 different skins available:
| custis | default | blue |
|---|---|---|
 |  |  |
| flower | yatil | pixel |
|---|---|---|
 |  |  |
Creating your own skins
With the S5SlideShow extension you can easily create your own S5 skins, using only wiki-page editing. S5 skin is simply a file with CSS styles for specific HTML elements. To be correct, there are several CSS's, but most of the time you need only one «pretty.css» to change how the slide show looks.
CSS styles can be put on Wiki pages with names like MediaWiki:S5/custis/pretty.css, where custis is the skin name (replace with yours), and pretty.css is the CSS stylesheet name. Most of the time you only need to edit pretty.css, but if you'll need to change other builtin styles - you can also change core.css, base.css and framing.css. Builtin S5 skins can be changed in the same manner — the wiki page content overrides files from the extension distribution.
CSS styles could obviously use some images, and here, all is also simple — if you want to use your own image in the style, just upload it to MediaWiki (using only latin letters, numbers and '.', '-', and '_' characters in file name), and add it your CSS as following: url(filename.png). When S5SlideShow will generate CSS for your skin, this construction will be replaced with a correct path to your image.
After that, passing your skin name as <slide style=""> will work in all presentations.
Example style links — open them despite of they're red (article does not exist), they'll show you the default CSS stylesheets of blue skin:
- MediaWiki:S5/blue/core.css
- MediaWiki:S5/blue/base.css
- MediaWiki:S5/blue/framing.css
- MediaWiki:S5/blue/pretty.css
Remarks
- Duality
- There are several features that make S5 in combination with MediaWiki a unique technology — firstly, slide shows are created very simply, and secondly, there is no more need to maintain two versions of presentation «with» and «without» remarks — «for slide show» and «for home reading». For «home reading» the normal article view mode can be used, because you can make its part non-mapped to slides. Moreover, such slide shows allow simple collaborative work, version control and other normal Wiki features.
- Opera
- As it was already mentioned, you need to press F11 to go into slideshow and fullscreen mode in Opera browser. It’s not required in Firefox and Chrome.
- Control panel
- If you move the mouse cursor over the lower-right corner of the slide show, you can see a simple slide show control panel.
- Skin selection
- Any slide show can be opened using any available skin without changing its definition — you only need to add &s5skin=NAME to slide show URL (where NAME is the skin name).
- WISYWIM
- In MediaWiki4Intranet, you can use «live auto-preview» to perform «almost WISYWIM» (What You See Is What You Mean) mode editing. To do so you need to check the «slides» checkbox below the edit area, select desired auto-refresh time (30 seconds by default) and click «Auto-preview» (FIXME checkboxes may be not translated from russian by now). A new browser tab or window will be opened, and you can place it at the right side of edit window or, for example, on the second display. It will contain the slideshow you are editing, and position within it (slide #) will be preserved, and it will refresh each XX seconds (30 by default).
- Incremental (step-by-step) display
- There are 3 ways to do it.
First: If the slide is marked with «incremental» mark (incmark attribute) all lists — ordered and unordered ones — will be displayed item-by-item.
Second: On any slide, the contents of any element with CSS class="anim" will be shown item-by-item (for example <div class="anim"><div>i.1</div><div>i.2</div></div> and etc).
Third: a single element can be marked with class="incremental" and it will become an «additional step» for display. - Step-by-step «animations»
- If you mark some element (most commonly <div>) with class="anim over", then the contents of this element will be shown not just step-by-step, but each next subelement will replace the previous one. You can use it for effects like this: animation example from S5 author (works only in Firefox/Chrome, because there is an old S5 version). This also isn’t a basic S5 ability and also is our feature.
- Link to slide
- If you want to make a link to specific slide, add the #slideN anchor to slide show URL. N is slide number, beginning with 0 which is the title slide. Also, our S5 version preserves the position (current slide number) on page reload (F5, Ctrl-R). And this is also our feature :)
Example
Slide show definition example (can be used as a stub for copy-paste):
<slide style="custis" headingmark="Slide:" incmark="(step)" scaled="true">
;author: Presentation Author
;title: Multithreading in Java (beginning)
;subtitle: Multithreading in Java (beginning)
;subfooter: {{date}}
</slide>
Installation
Installation is very simple. All you need is to get the code into /extensions/S5SlideShow subdirectory (you can’t use other path as it’s hardcoded by now) and add a line to LocalSettings.php:
require_once "$IP/extensions/S5SlideShow/S5SlideShow.php";
Also you can specify some configuration, but this is not required:
// headingmark attribute default value
$egS5SlideHeadingMark = '';
// incmark attribute default value
$egS5SlideIncMark = '(step)';
// pagebreak attribute default value
$egS5SlidePageBreak = '\\\\';